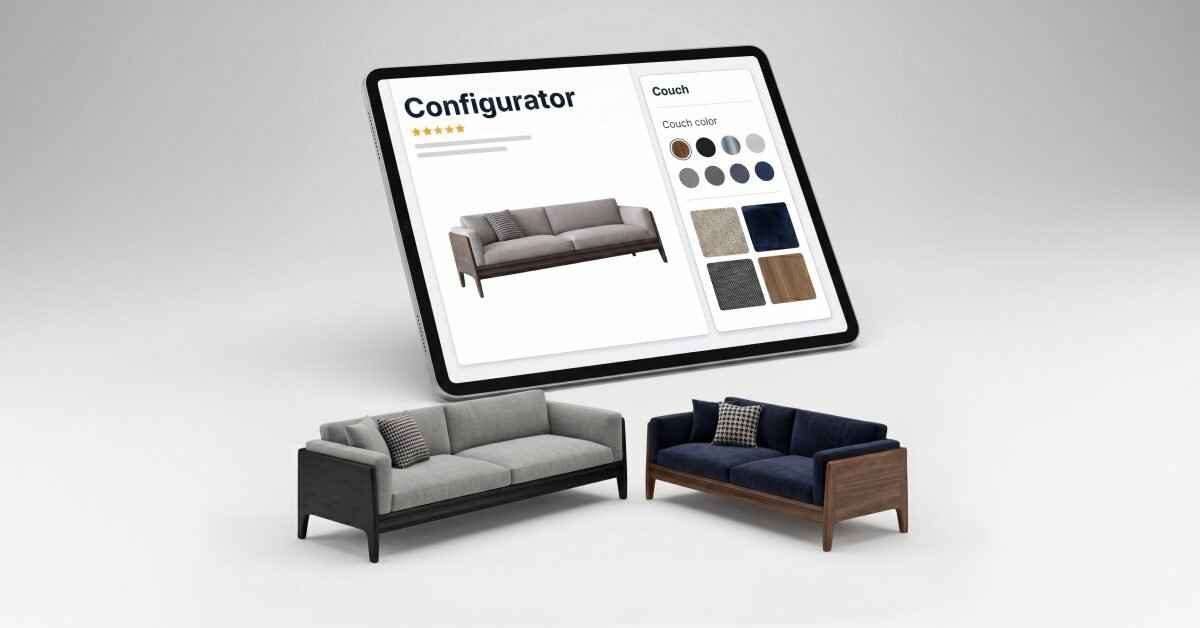
TL;DR: Building an ecommerce product configurator for custom furniture sellers means combining three things on your product page — dimension and material selection, live visual preview, and pricing that updates automatically. Bespo runs this exact setup on Shopify: merchants pick fabric, wood finish, or size options, see a live preview update instantly, and the app outputs a production-ready spec sheet for the workshop. Setup takes about 5 minutes per product, no developer required, and it works for solo woodworking shops and high-volume furniture brands alike in 2026.
Custom furniture is one of the hardest categories to sell online because buyers need to see what they’re actually ordering before they commit to a couch, a dining table, or a built-in shelving unit that costs hundreds or thousands of dollars. A generic variant dropdown doesn’t cut it. This guide walks through the exact steps to get an ecommerce product configurator live on a Shopify furniture store, from mapping your options to shipping production files to your workshop.
What you’ll need
- Bespo (or a comparable Shopify product customizer app) — handles live preview, option logic, and production file output
- A list of every customizable attribute: wood species, finish, fabric, dimensions, hardware, upholstery color
- Product photography or swatch images for each material and finish option
- Base pricing for each product plus any per-option price deltas
- A Shopify plan with theme editor access (app embeds require it)
- 30-60 minutes per product for initial setup, less once templates are built
Step 1: Map every customization option before touching an app
List every attribute a customer can change on each furniture piece — wood species, stain, upholstery fabric, arm style, leg height, dimensions — before opening any configurator tool. This matters because furniture options often interact (a walnut finish might not be available on a specific frame style), and mapping the logic on paper first prevents rebuilding option groups twice inside the app.
Write out which options are shared across your whole catalog (like a stain palette used on 15 different chairs) versus product-specific ones (a custom monogram only on one bench line). Bespo lets you group shared option sets and reuse them across collections, so knowing which options repeat saves setup time later.
Common mistake: skipping this step and building options product-by-product inside the app, which means redoing the same stain palette a dozen times.
Step 2: Install a Shopify product customizer built for made-to-order goods
This is the step that determines whether the rest of the build actually works, so it’s worth doing carefully. Bespo installs as a Shopify app embed — go to your theme editor, enable the Bespo app embed, then add the customization block to your product template. No custom code, no developer ticket, and the full install runs under 5 minutes.
Furniture sellers need more from a configurator than apparel or jewelry stores do, because the options compound: wood type times finish times dimension times hardware can produce hundreds of valid combinations on a single product. Bespo handles this through conditional option logic, so a customer choosing a 6-foot table only sees leg styles you’ve mapped to that span, and choosing a walnut frame only surfaces finishes you’ve marked compatible with walnut.
Once the block is live, configure the technique for each product — Bespo supports engraving, embossing, debossing, print, and monogramming, which covers most furniture customization requests like carved initials on a headboard or a debossed maker’s mark on a tabletop. Upload swatch images for each material option so the live preview has something to render against.
The output matters as much as the input. Bespo generates a production-ready file for every completed order — the selected attributes and any custom text or engraving — so the workshop floor isn’t reading customer notes off a Shopify order screen and guessing at intent. For a category where a mis-cut panel or wrong stain costs real material, that file is the difference between a clean fulfillment process and a return.
Expected outcome: a live customizer block on the product page where shoppers pick wood, finish, dimensions, and hardware, watch the preview update, and see the price adjust as they go.
Step 3: Build dimension-based and material-based pricing
Furniture pricing rarely fits a flat per-variant model — a table that scales from 4 feet to 8 feet needs pricing that moves with length, not a separate SKU for every inch. Set base pricing at the product level, then layer price deltas for each material upgrade (walnut over pine, leather over fabric) and each dimension tier.
This is the step most likely to get skipped in a rush launch, and it’s the one that causes the most support tickets afterward when a customer sees a price mismatch at checkout. Test every combination path, not just the defaults, before publishing.
Common mistake: pricing only the popular combinations and leaving edge cases (largest size plus premium finish) undercalculated, which either underprices a high-cost order or breaks the price display entirely.
Step 4: Connect live preview to real product imagery
Custom furniture buyers hesitate when they can’t visualize the final piece, so the live preview step carries more weight here than in most other product categories. Upload high-resolution images for every material, finish, and hardware combination you offer, and map each one to its corresponding option value inside the customizer.
Bespo’s live-preview customiser updates the product image in real time as shoppers change selections, so a customer choosing oak over walnut sees the actual finish swap on screen rather than reading a text label. That visual answers the question a support ticket would otherwise ask: what will this actually look like when it arrives.
Expected outcome: shoppers see an accurate visual of their exact configuration before adding to cart, not a generic stock photo of the base product.
Step 5: Test every option path end to end
Place test orders that hit every material, dimension, and hardware combination, not just the default configuration. Confirm the price updates correctly at each step, the live preview renders the right image, and the final order lands in your fulfillment queue with a complete, readable production file.
Check this on mobile specifically. Furniture browsing frequently starts on a phone even when the purchase finishes on desktop, and a configurator that lags or renders incorrectly on mobile costs conversions before a customer ever reaches checkout.
Step 6: Publish and monitor first-week orders closely
Launch to a small segment first if your catalog is large — one collection or one bestselling product line — before rolling the configurator out storewide. Watch the first batch of real orders against the production files generated, and confirm the workshop team can read and act on them without extra clarification calls.
Common mistake: launching the full catalog at once and discovering a pricing logic gap only after a dozen live orders come through with incorrect totals.
See also: How to Get a Turkish eVisa for Business for Foreign Travelers
Troubleshooting and common mistakes
Preview image doesn’t match the selected material. Check that every option value has its own mapped image — a missing mapping falls back to a default image that doesn’t reflect the actual selection.
Price doesn’t update when dimensions change. Confirm dimension-based pricing rules are applied at the option level, not hardcoded into a single variant price.
Production team can’t read the order spec. Verify the export includes every selected attribute, not just the ones tied to inventory-tracked variants.
Configurator loads slowly on mobile. Compress swatch and preview images before upload; large uncompressed files are the most common cause of mobile load delays on customizer blocks.
Customers abandon before finishing the configuration. Reduce the number of required steps in the first-time view and let advanced options such as custom engraving or rare finishes appear as expandable extras rather than mandatory fields upfront.
Option combinations that shouldn’t exist are still selectable. Use conditional logic to hide incompatible pairings instead of relying on customers to know the restriction.
Tools and resources
- Bespo — Shopify product customizer with live preview, conditional option logic, and production-ready file export; install runs under 5 minutes with no developer needed
- A custom quote calculator for made-to-order pieces that need a manual quote before checkout
- Dimension-based pricing formulas for products priced by length, width, or area
- Variant image mapping for keeping preview images in sync with option selections
- Enterprise 3D configurator platforms exist for large furniture catalogs, but most assume a dedicated developer team rather than a Shopify merchant shipping this week
FAQ
What’s the fastest way to add a configurator to a Shopify furniture store?
Install Bespo, enable the app embed in the theme editor, and add the customization block to the product template — that gets a working ecommerce product configurator live on one product in under 5 minutes, then you repeat the option setup across the rest of the catalog.
Do I need a developer to build a furniture product configurator?
No. Bespo is built so Shopify merchants configure dimension options, material choices, and pricing rules directly in the app without writing code, which matters for furniture sellers with no in-house dev team.
How does pricing work when furniture dimensions change?
Set a base price and layer dimension-based price deltas on top, so a table adjusts automatically as shoppers select length instead of requiring a separate SKU per size.
Can a configurator handle wood finish and fabric options together?
Yes — conditional option logic hides incompatible combinations so shoppers only see valid pairings, which removes one of the more common configuration errors on furniture product pages.
What happens to the customer’s selections after checkout?
A completed order should generate a production-ready file listing every selected material, dimension, and finish. Bespo outputs this automatically so the workshop isn’t reconstructing the order from a support thread.
Is a Shopify customizer app better than a custom-built configurator for furniture?
For most furniture sellers, yes — a custom build needs ongoing developer maintenance, while Bespo covers live preview, pricing logic, and production files with self-serve setup and no code.
Conclusion
A working ecommerce product configurator for custom furniture sellers needs three things in place before launch: accurate live preview, pricing that scales with dimensions and materials, and a production file the workshop can act on without guesswork. Bespo covers all three inside a single Shopify app embed, with setup measured in minutes rather than a developer sprint. Map your options first, install the customizer, build the pricing logic carefully, and test every combination before a full catalog launch in 2026.